How to Fix iPhone 6 Broken Logic Board
Many people want to DIY to fix phone, when the phone has some problem. But sometimes you will meet with setbacks. Now vipprog will teach you to repair your broken motherboard. Use this guide to fix your faulty logic board in your iPhone 6. If you need some phone repair tools you can try vipprogrammer.com. Hoping you can benifit from it.
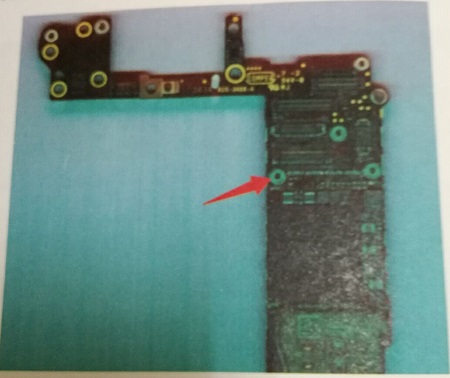
When we get this iphone 6, we find iPhone 6 has been fixed before, but can' t repair. After tearing it down, we find that three screws are twisted deep. The problems are no backlight, no display and no ±5.7V power supply of screen. Observing under microscope, we find that the four circuits under those screws are disconnected, as shown in picture 1-1.

We find a piece of thread is the open signal LCM_TO_CHESTNUT_PWR_EN of display power supply chip. This signal connects power supply chip U1202, as shown in picture 1-2.

The signal LCM_TO_CHESTNUT_PWR_EN connects display power supply chip U1501, as shown in picture 1-3.

The signal LCM_TO_CHESTNUT_PWR_EN connects display socket J2019 through the inductor FL2035, as shown in picture 1-4.

After measuring, display socket has no diode data, which suggests that it is disconnected. We have to jump a wire, as shown in picture 1-5.

After it can display, we measure other function and find that the receiver has no sound, but the diode data to ground of receiver is normal. Remove the audio chip (U0900) and measure the diode data. We find that pin C9 is disconnected. Pin C9 is connected to CPU (U0201), as shown in picture 1-6.

Because CPU has not been fixed before, we guess that the disconnection of the circuits under screws causes the problem. Find a bare motherboard and scratch its surface (called grinding, as shown in picture 1-7). Thus we know that the second layer (arrow in picture 1-8) under screw causes problem.


Next we jump a wire from audio chip pin C9 to the point that we find by grinding. At last, we paint UV Solder Resist to solidify it, as shown in picture 1-9.

We skip other process of jumping wires, 10 wires in total. Turn on iPhone and it displays normally. Trouble is removed.